How to Set Up Two-factor Authentication for WordPress
11/12/2025
Two-factor authentication (2FA) is a crucial defence against cybercriminals, as by adding an additional layer of security beyond simple password entry, it can prevent hackers from accessing your online accounts if your password is leaked.
In this article, you will learn how to set up two-factor authentication to add an extra layer of security to your WordPress site.
The Two-factor Plugin
To add 2FA to the WordPress login flow, we will use the ‘Two-Factor’ plugin. The plugin is available on the WordPress Plugin Directory, and is developed by WordPress.org contributors. It provides four useful 2FA methods:
- e-mail codes;
- time-based one-time passwords (TOTP);
- FIDO Universal 2nd Factor (U2F); and
- backup codes.
The TOTP option is particularly useful for people who like to use authenticator apps, such as Microsoft Authenticator. For those who prefer to use physical security keys — e.g., Yubikey — the U2F option is invaluable. Alternatively, if you desire simplicity, you could use the e-mail codes option to simply have one-time codes sent to your e-mail inbox.
Once you have decided which method you wish to use, you can install the plugin and configure your 2FA settings to reflect your choice.
Installing The Plugin
To install the plugin, you can either manually upload the plugin files to your site, or install the plugin by searching for it directly through your WordPress admin dashboard. I shall focus on the latter option here.
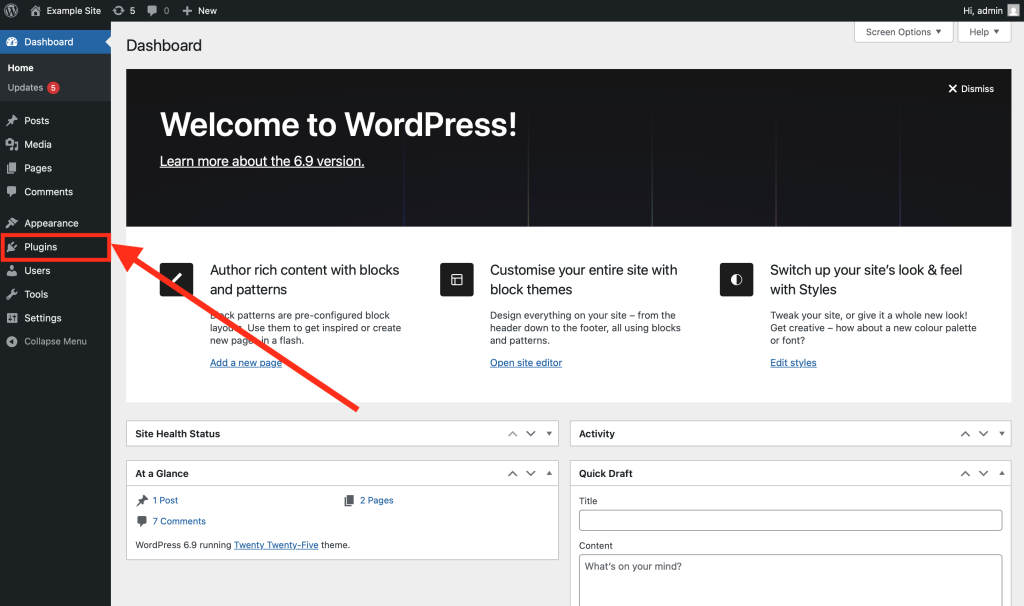
Step 1: To begin, login to your admin dashboard and navigate to the ‘Plugins’ page.
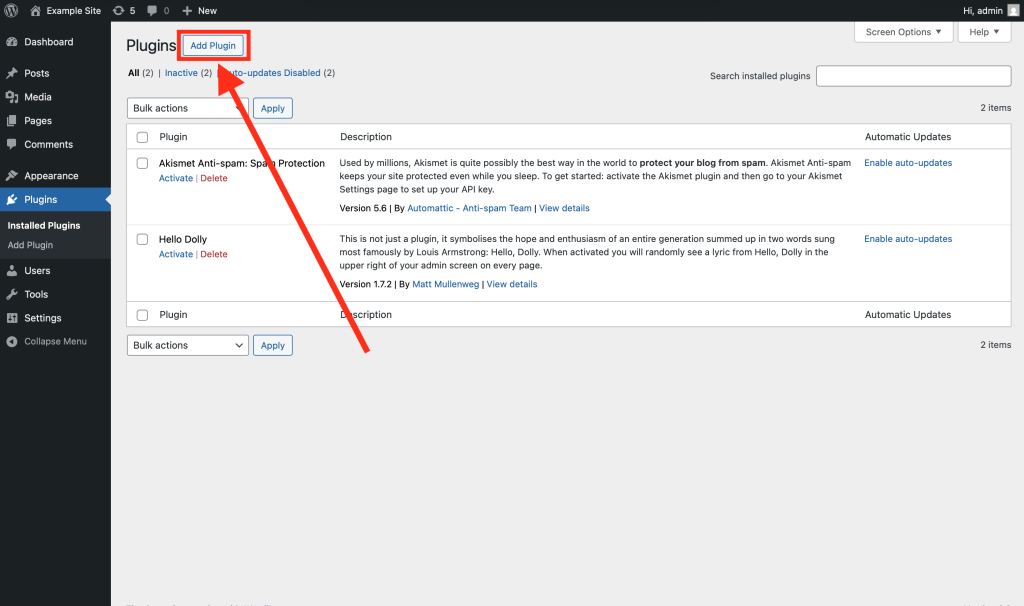
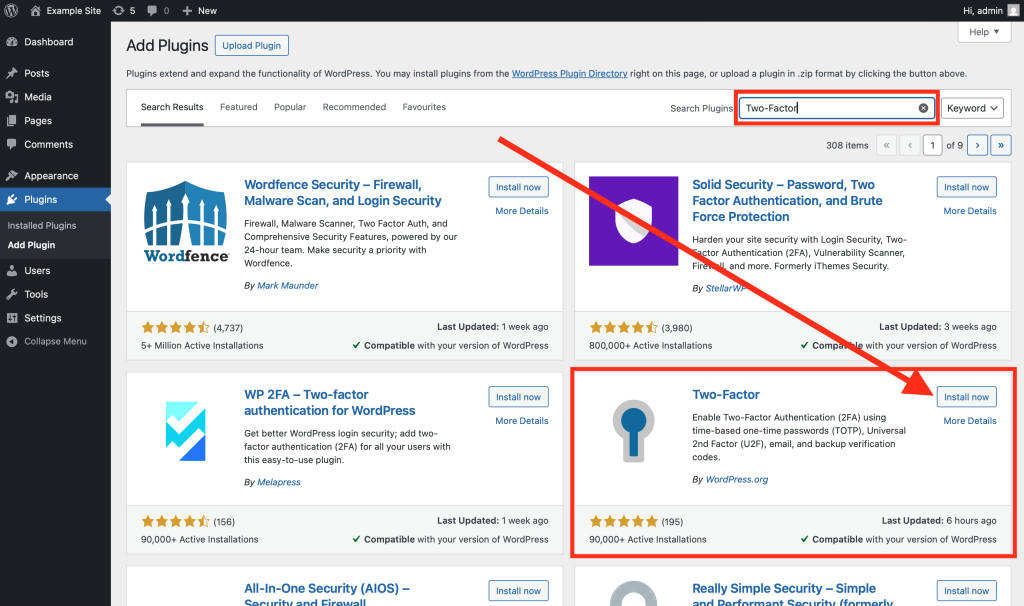
Step 2: Once on the plugins page, click the ‘Add Plugin’ button to access the plugin directory. Then, type ‘Two-Factor’ into the search box before hitting the ‘enter’ — i.e. ‘return’ — key on your keyboard.
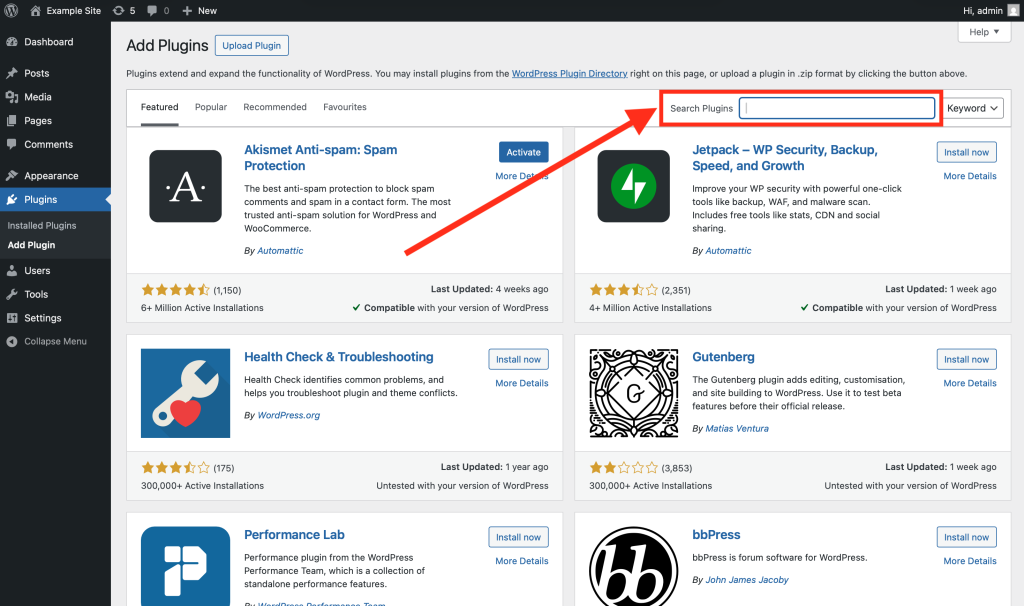
Step 3: After searching, many plugins will appear. Install the correct plugin — highlighted below — created by ‘WordPress.org’, by clicking the ‘Install Now’ button on its card.
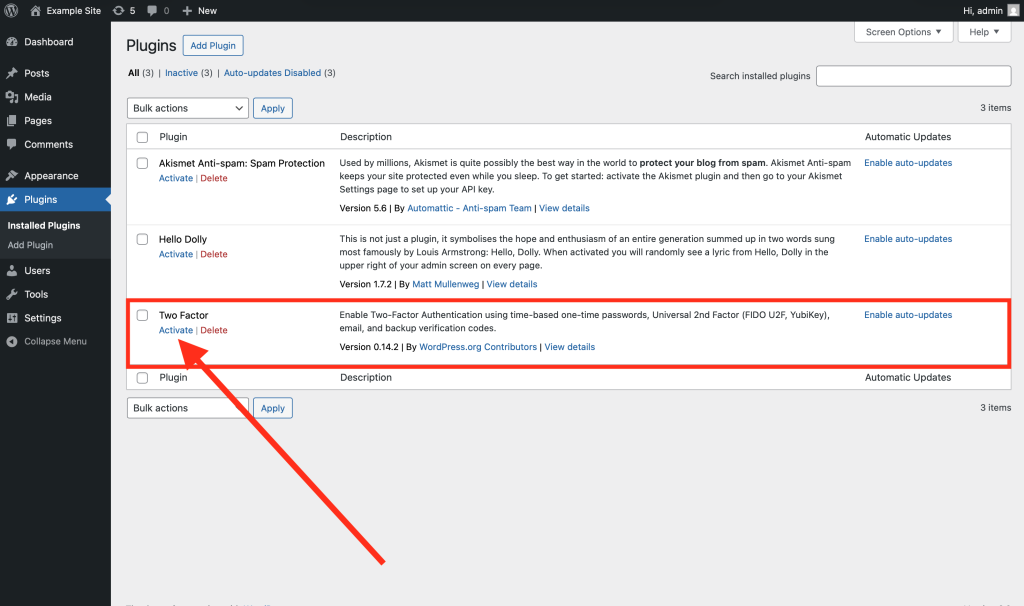
Step 4: Once the plugin has been successfully installed, navigate back to the ‘Plugins’ page. Then, find the plugin in the list, and click ‘Activate’. This will activate the plugin on your site.
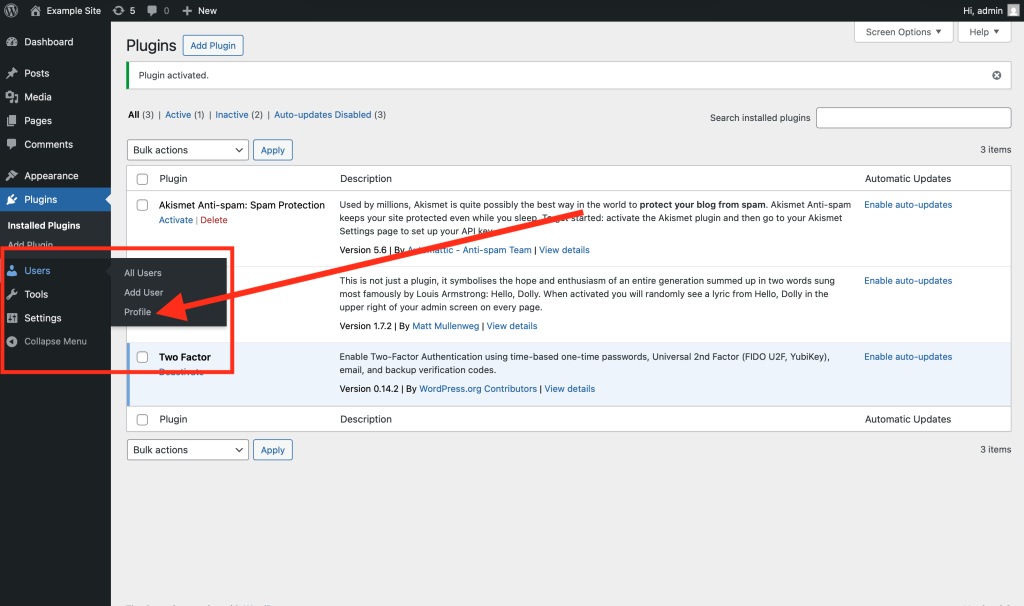
Step 5: Now that the plugin has been activated, you can configure two-factor authentication for your user account. This configuration is performed from your user profile settings, which can be accessed by hovering over the ‘Users’ tab in the sidebar, and selecting ‘Profile’ — alternatively, you could simply navigate to the ‘Users’ page and select your user account from the list.
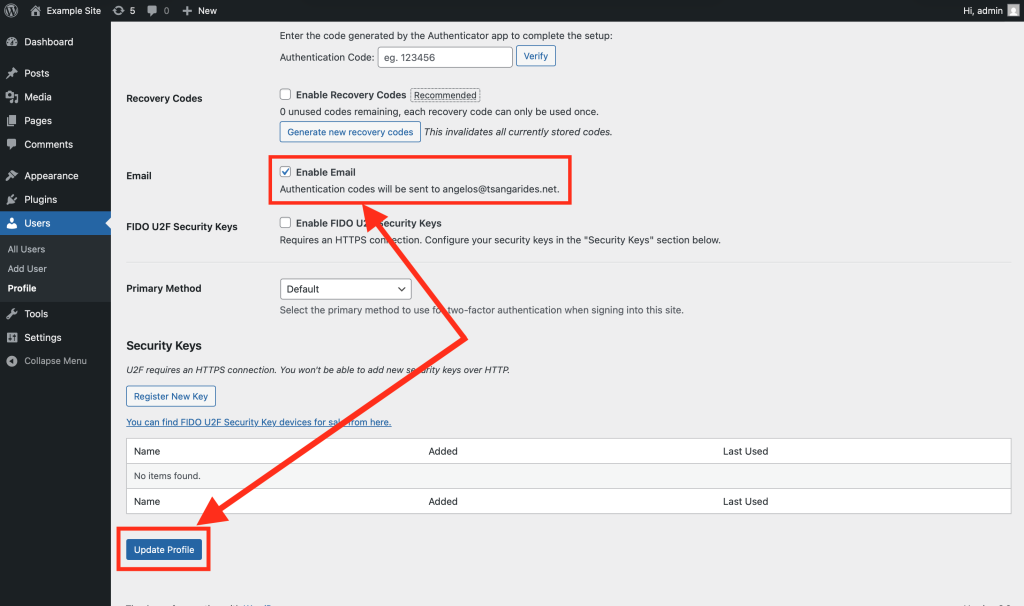
Step 6: Once on your profile settings page, scroll down until you find the two-factor options section. This section will display all of the 2FA methods that you can choose from, and will allow you to configure them.
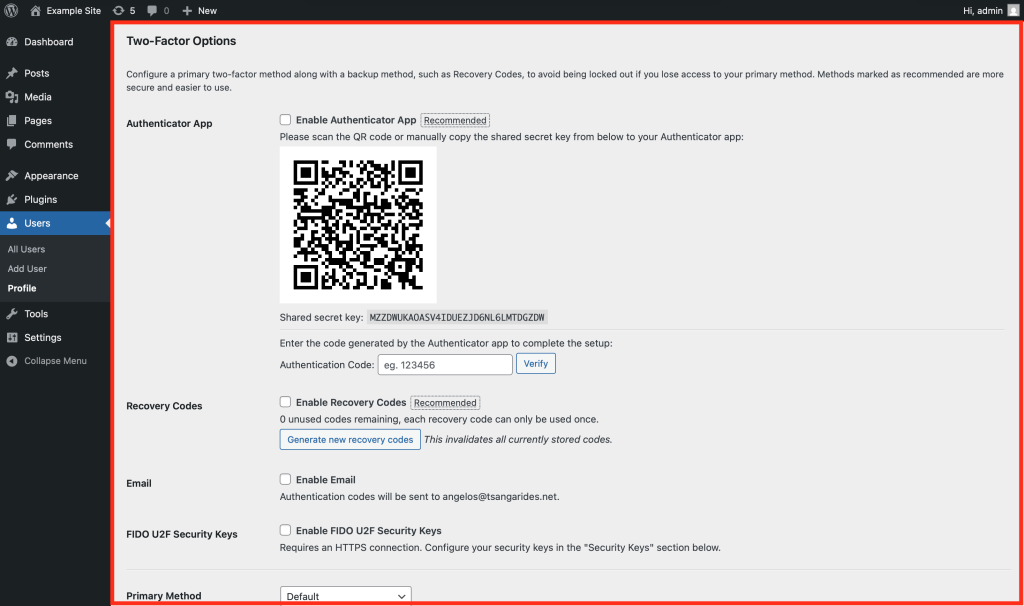
Step 7: You can now enable one or more 2FA methods by using the checkboxes. If using multiple methods, you can also use the ‘primary method’ drop-down box to choose your preferred primary method.
For demonstration purposes, I will simply enable the e-mail codes method. You can do this by ticking the ‘Enable Email’ checkbox. Once you have done this, click the ‘Update Profile’ button at the bottom of the page to save your changes.
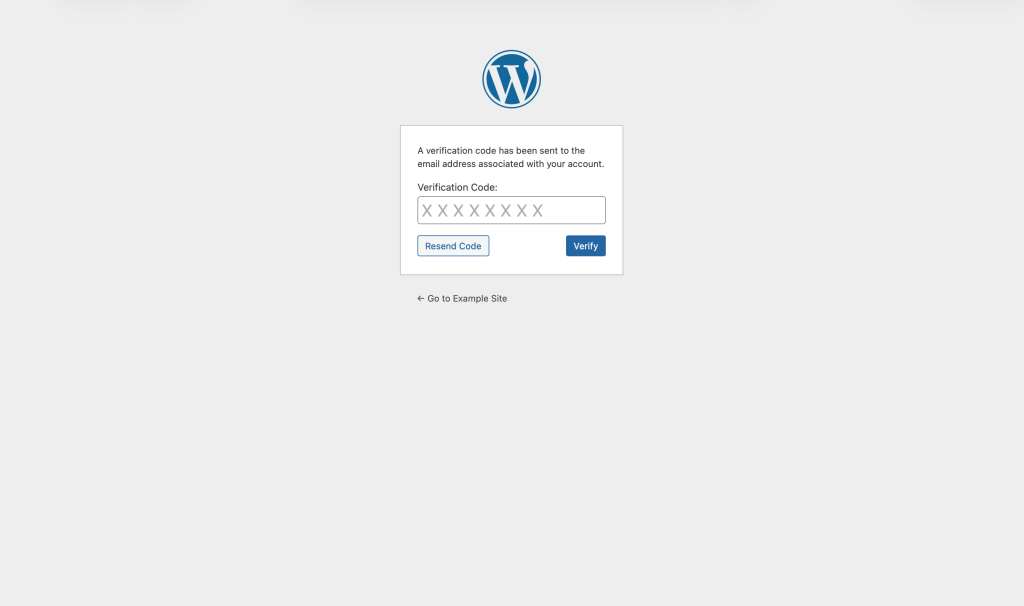
If you followed each step correctly, you should now be prompted with a 2FA screen when you next attempt to login.
Wrapping Up
The benefits of two-factor authentication are widely understood, and so setting it up on your site using the above instructions is a great measure to increase the security of your website.
If you have any questions relating to this article, or simply WordPress in general, please feel free to get in touch.
If you would like to stay up-to-date with more tips and advice, sign up to my free newsletter.